How to Build a Fire in a Fireplace
When people in my cultural nexus are not skilled at building fires, they tend to feel embarrassed about it. This is actually one of the most hopeful cultural signs I see around me. There is a sense that, despite all of fire’s ✌️“practical”✌️ uses having been replaced technologically, its spiritual value is still so high that there is social pressure to know how to work with it. And yet, due to spiritually impoverished material culture in my society, many people don’t know how.
I’m here to help. With a few sound principles and inexpensive supplies, anyone can build a strong, efficient indoor fire in a few minutes with a single match and no struggling.
If you’re struggling, the fire is struggling. Fires want the same things we want: to breathe easily, to eat well, and to be warm. Building a fire is the most natural thing in the world for a human being; that’s why it feels so good and brings people together better than anything else. If you want to feel the peerless satisfaction of building a wonderful fire for people, here are my step-by-step recommendations.
1. Make the Bed
The first step starts with the previous fire. I believe in leaving a nice, fluffy bed of ashes on the floor of the fireplace. You can’t let it build up too high, or it will choke off the airflow from underneath, but you don’t want a cold concrete floor supporting your fire. A bed of ashes insulates better. Keeps things cozy. That’s what you want, that’s what a fire wants. So unless this is your first fire of the year, begin by smoothing out the ashes into a nice, fluffy bed.
Then place your first log. Find the log with the flattest profile, so it can fit fairly far back in the fireplace but still leave an inch of space behind it. Place it so the straightest, most flammable edge is forming a vertical wall in the center of the fireplace. If you don’t have a log that has an exposed core with a flat edge like this, split one.
2. Form the Chamber
Now find a second log with roughly the same profile and place it leaned up against the front of the rack, with the bottoms of the flat sides touching. You want to form a V-shaped channel down the length of the logs that’s as closed as possible, letting just a little air through the bottom.
3. Kindle Your Fire


To light this fire, you really only need one piece of kindling, though I use two to make it even easier. You can buy enormous sacks of untreated pine fire starters for reasonable amounts of money. They light easily and burn quickly. I buy one gigantic sack of them about every two years.
You don’t need any newspaper or anything unless you don’t have these, in which case you will need to gather sticks or tear strips off of your logs or something like that. Paper egg cartons work really well for ignition. But I wanted to show you the good stuff, so you can get prepared ahead of time.
Your first move is to light one end of a pine stick with a single match. (Do it inside the fireplace so you don’t get smoke or fumes in the room.) This stick is now your match. Throw the used matchstick into the V-shaped chamber between the logs. Now use the lit end of one pine stick to light the other stick in as many places as you can, then throw it in the V. When you’re sure it’s lit and burning in there, throw the other one on top of it, with the unlit end you were holding close to the burning end of the other one, so it will catch quickly.
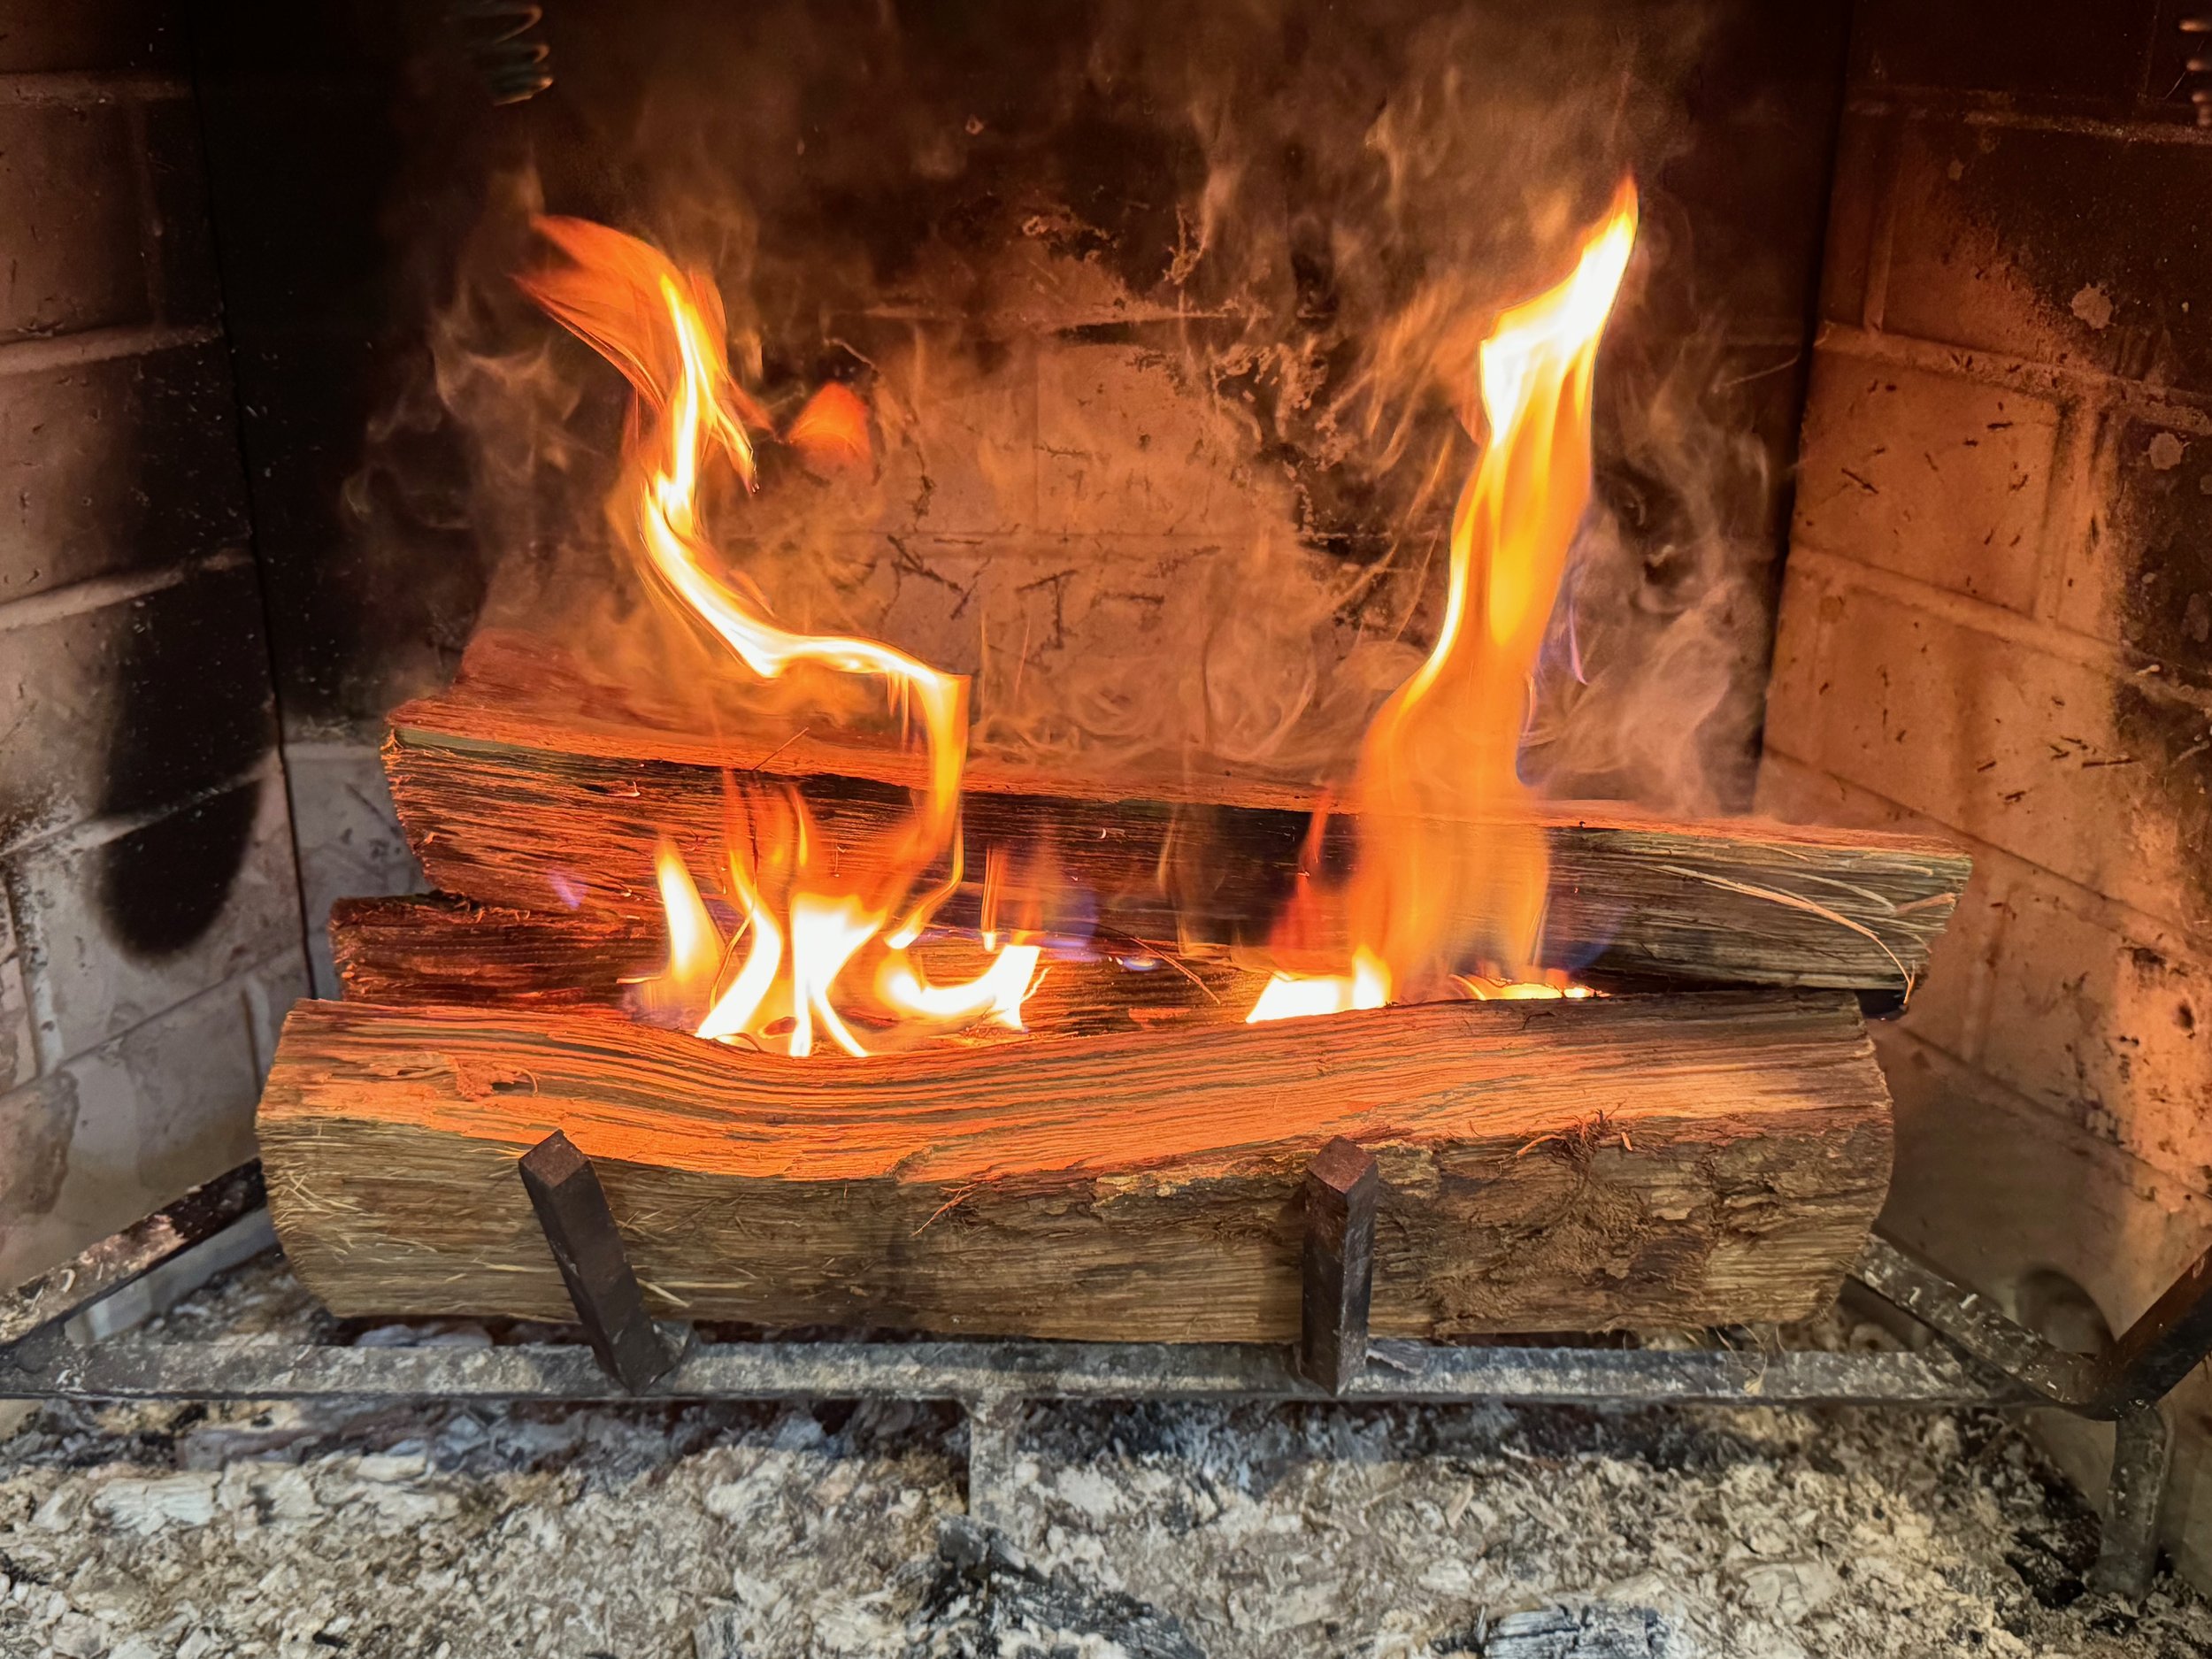
4. Close the Chamber


Once your pine sticks are going, find the smallest log you can that will rest stably along the top of the V-shaped chamber between the first two logs. Ideally it has a corner that will slot into the chamber, so that the fire can catch on two different sides at once after it starts licking at the bottom edge. The irregularities in the wood will allow gaps along both sides; this is good. That’s where the fire comes out.
Heat rises, remember? The goal here is to make a flammable box that heats up quickly, and the heat will escape along the sides and set both the top piece and the inner walls of the chamber on fire.
Really, we’re using multiple basic physics principles, not just “heat rises.” We’re creating pressure and friction. The small chamber heats up faster than the surrounding air, creating pressure inside, which then pushes up through the cracks on the side walls — going right through all that yummy, flammable fuel — creating friction with the edges that leads to fire.
5. Let it Catch

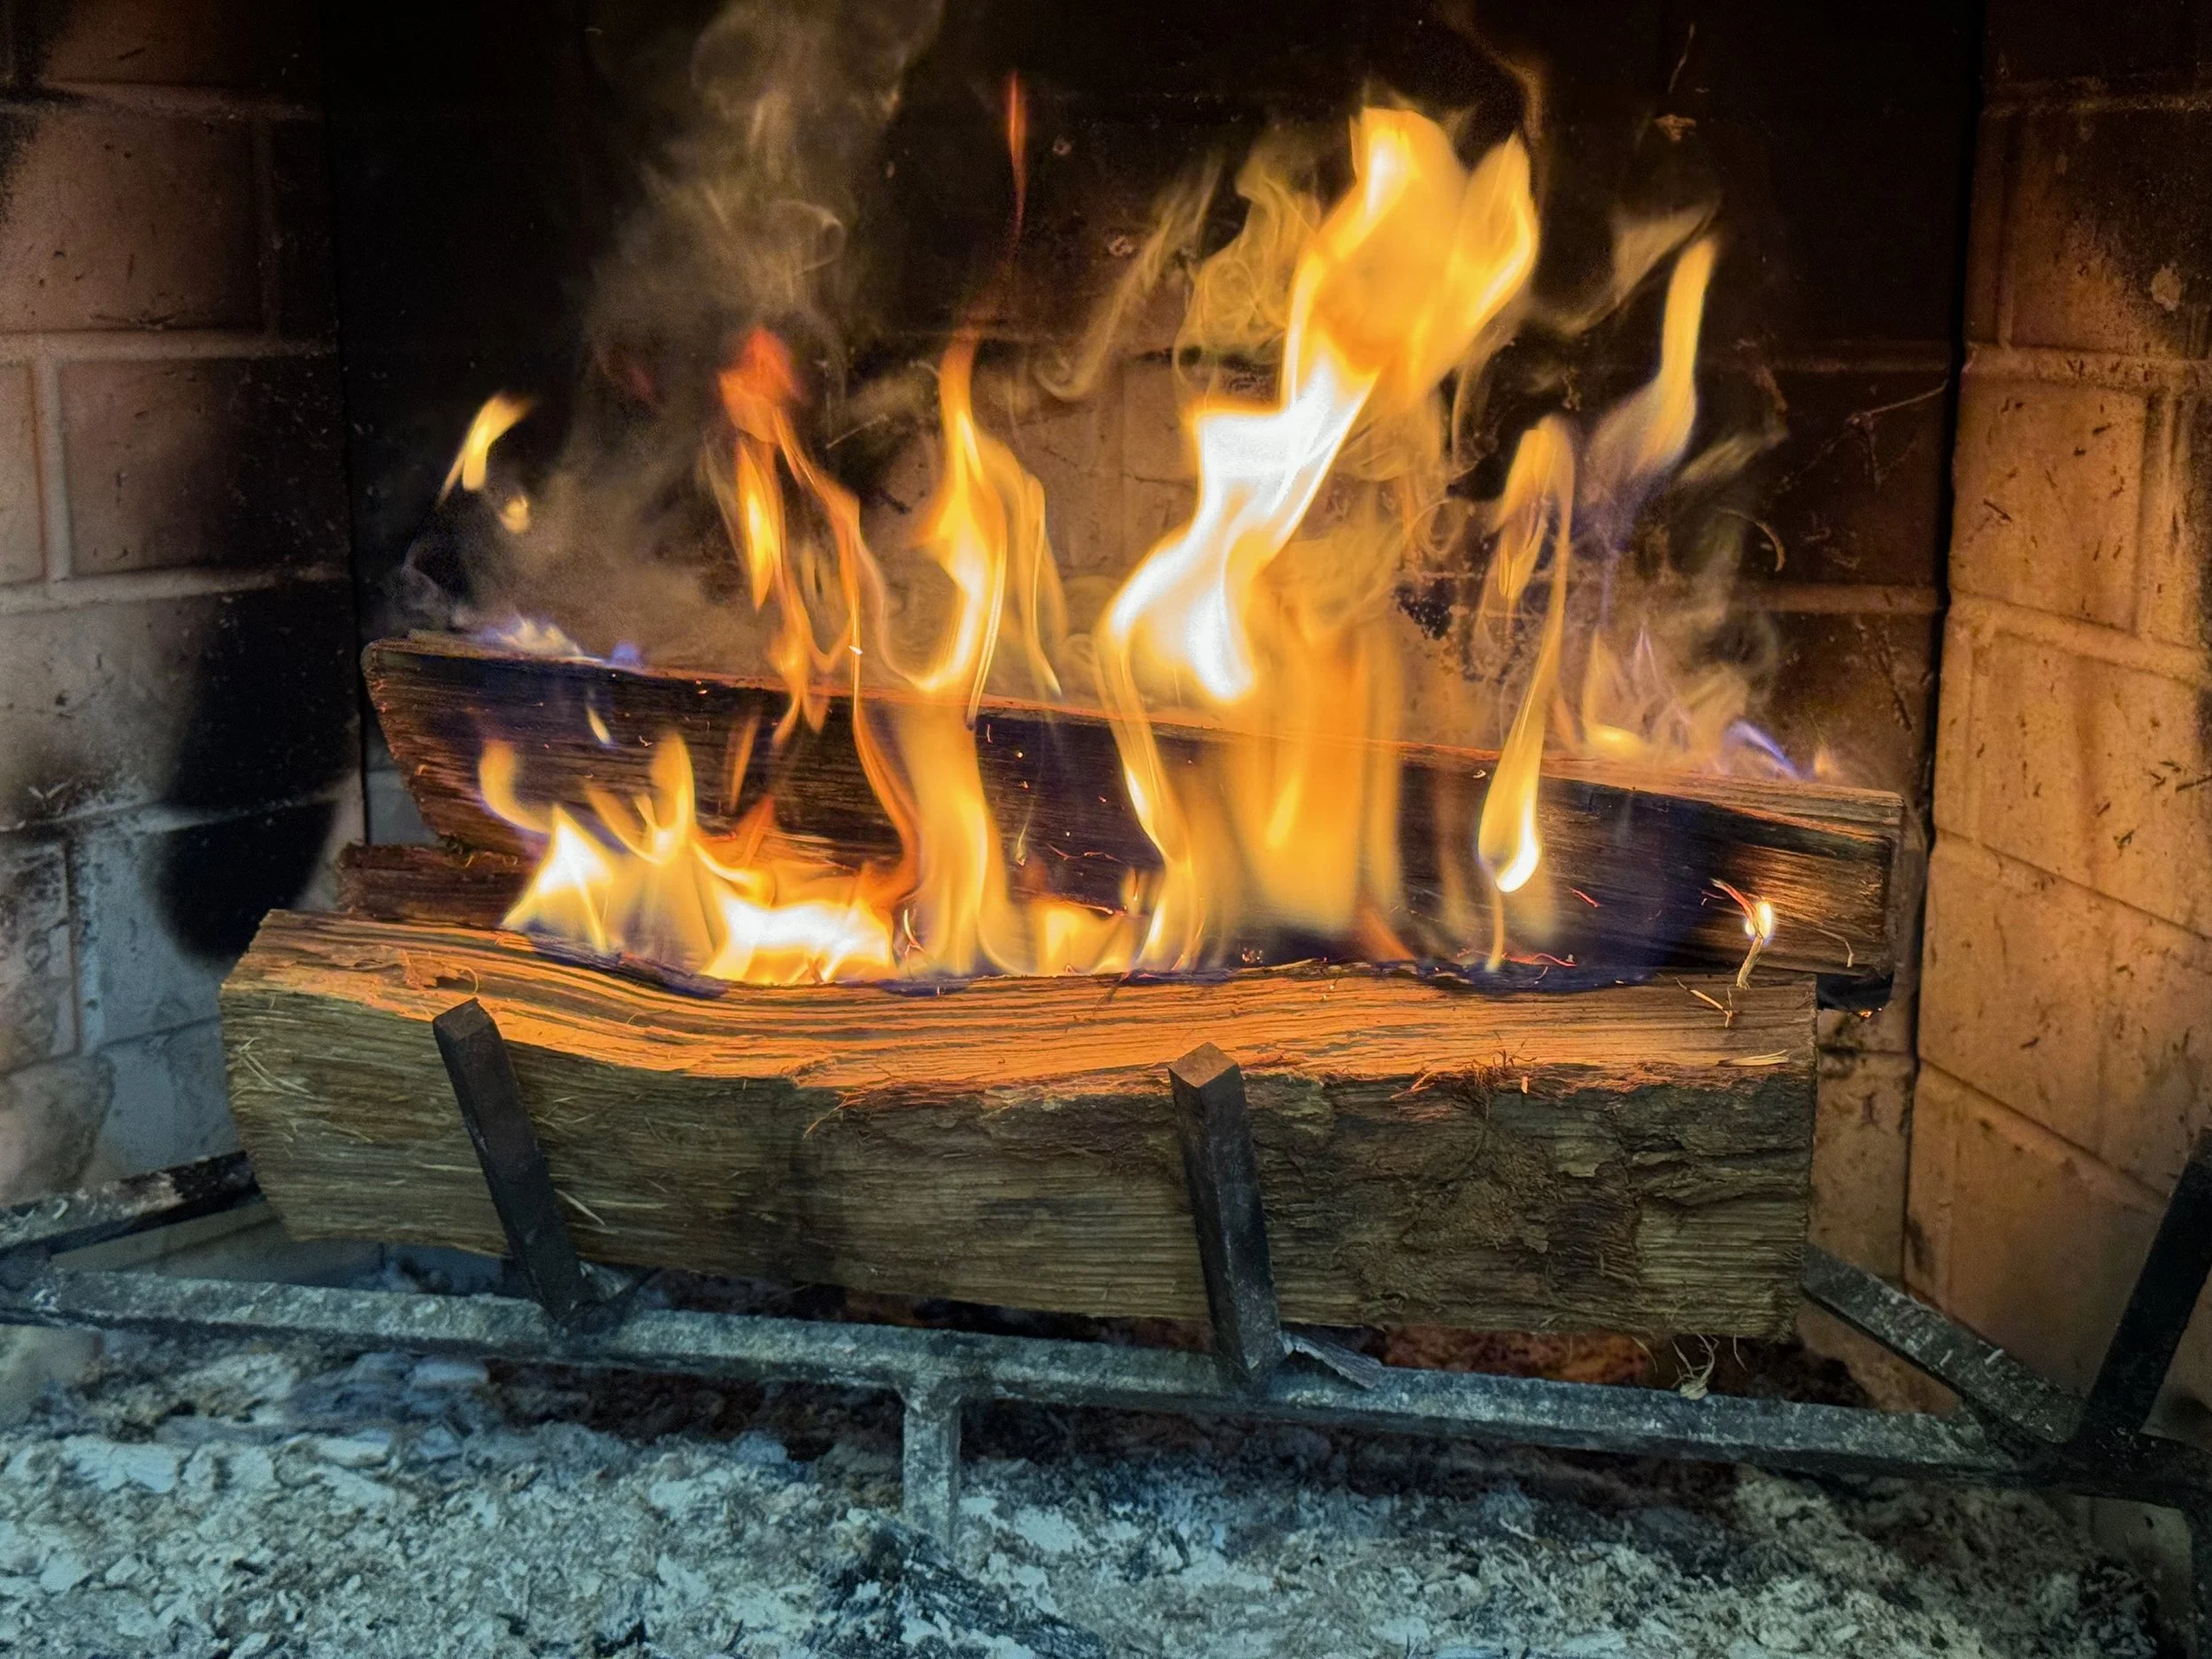
As the fire builds inside the chamber, smoke will begin to escape. Once you start to get a lot of smoke, you know what the fire wants now: air. So open the box a little bit. Just move the top log off kilter slightly with a tool or your hands, and the flames will jump out. Let it burn like this for a couple minutes until the top log starts to get fully involved.
6. Drop the Payload


Once the middle log is really going, it’s time to get the outer logs involved while you have a nice fire. Scoot the outer logs apart little by little, just until the kindling drops down below. You don’t want to drop it too quickly or too completely; it might go out. That’s not the end of the world, you just might need to light some more kindling and stick it in there. But if you do this part gently, the initial payload of kindling will drop down and start licking at the bottoms of the outer logs, which at this point are more or less untouched.
The center log, a good bit of which should be on fire at this point, will drop down a little more in the V chamber. Now the bottom of your fire is in a W shape, and the dropped kindling should start sending the flames up at least the inner four flammable edges if not the outer back and front edges as well.
The most critical thing to ensure at this point is that the central log remains very on fire, which shouldn’t be too hard.
7. Break the Wall
Now it’s time to make it happen. Take one end of the front log out, let the burning middle log drop down to the rack, and place the end of the front log over the top of it. Since one side of the front log is super hot and probably on fire already, you’re going to set the whole end on fire now and let the center log consume itself.
8. Consume the Offering


The introduction of the big front log will take things up several notches and should eat up the rest of that central log. As soon as it’s crumbly enough to do so, use tools to break the middle log apart and let it fall down onto the ash pile just like you did the kindling. Now you’ve got mega-kindling.
Now set the front log back down on the rack, and I recommend putting the side that was facing the front of the fireplace — the least on-fire side — facing down towards the burning coals. Now push it back towards the back log so you have just a thin crack for the fire to come up through, just like before, and before long you should have the bottoms and both sides of your first two logs firmly on fire.
9. Make Another Offering


Time to step on the gas. Go get a big chonkster log and lay it across the gap like you did with the front log in step 7. It should start to catch pretty quickly at this point — it’s getting hot in there — but it’s still not a big enough fire to eat a log like that in one gulp. Don’t get cozy yet; there’s still one more procedure before this fire is fully on.
10. Stoke the Coals

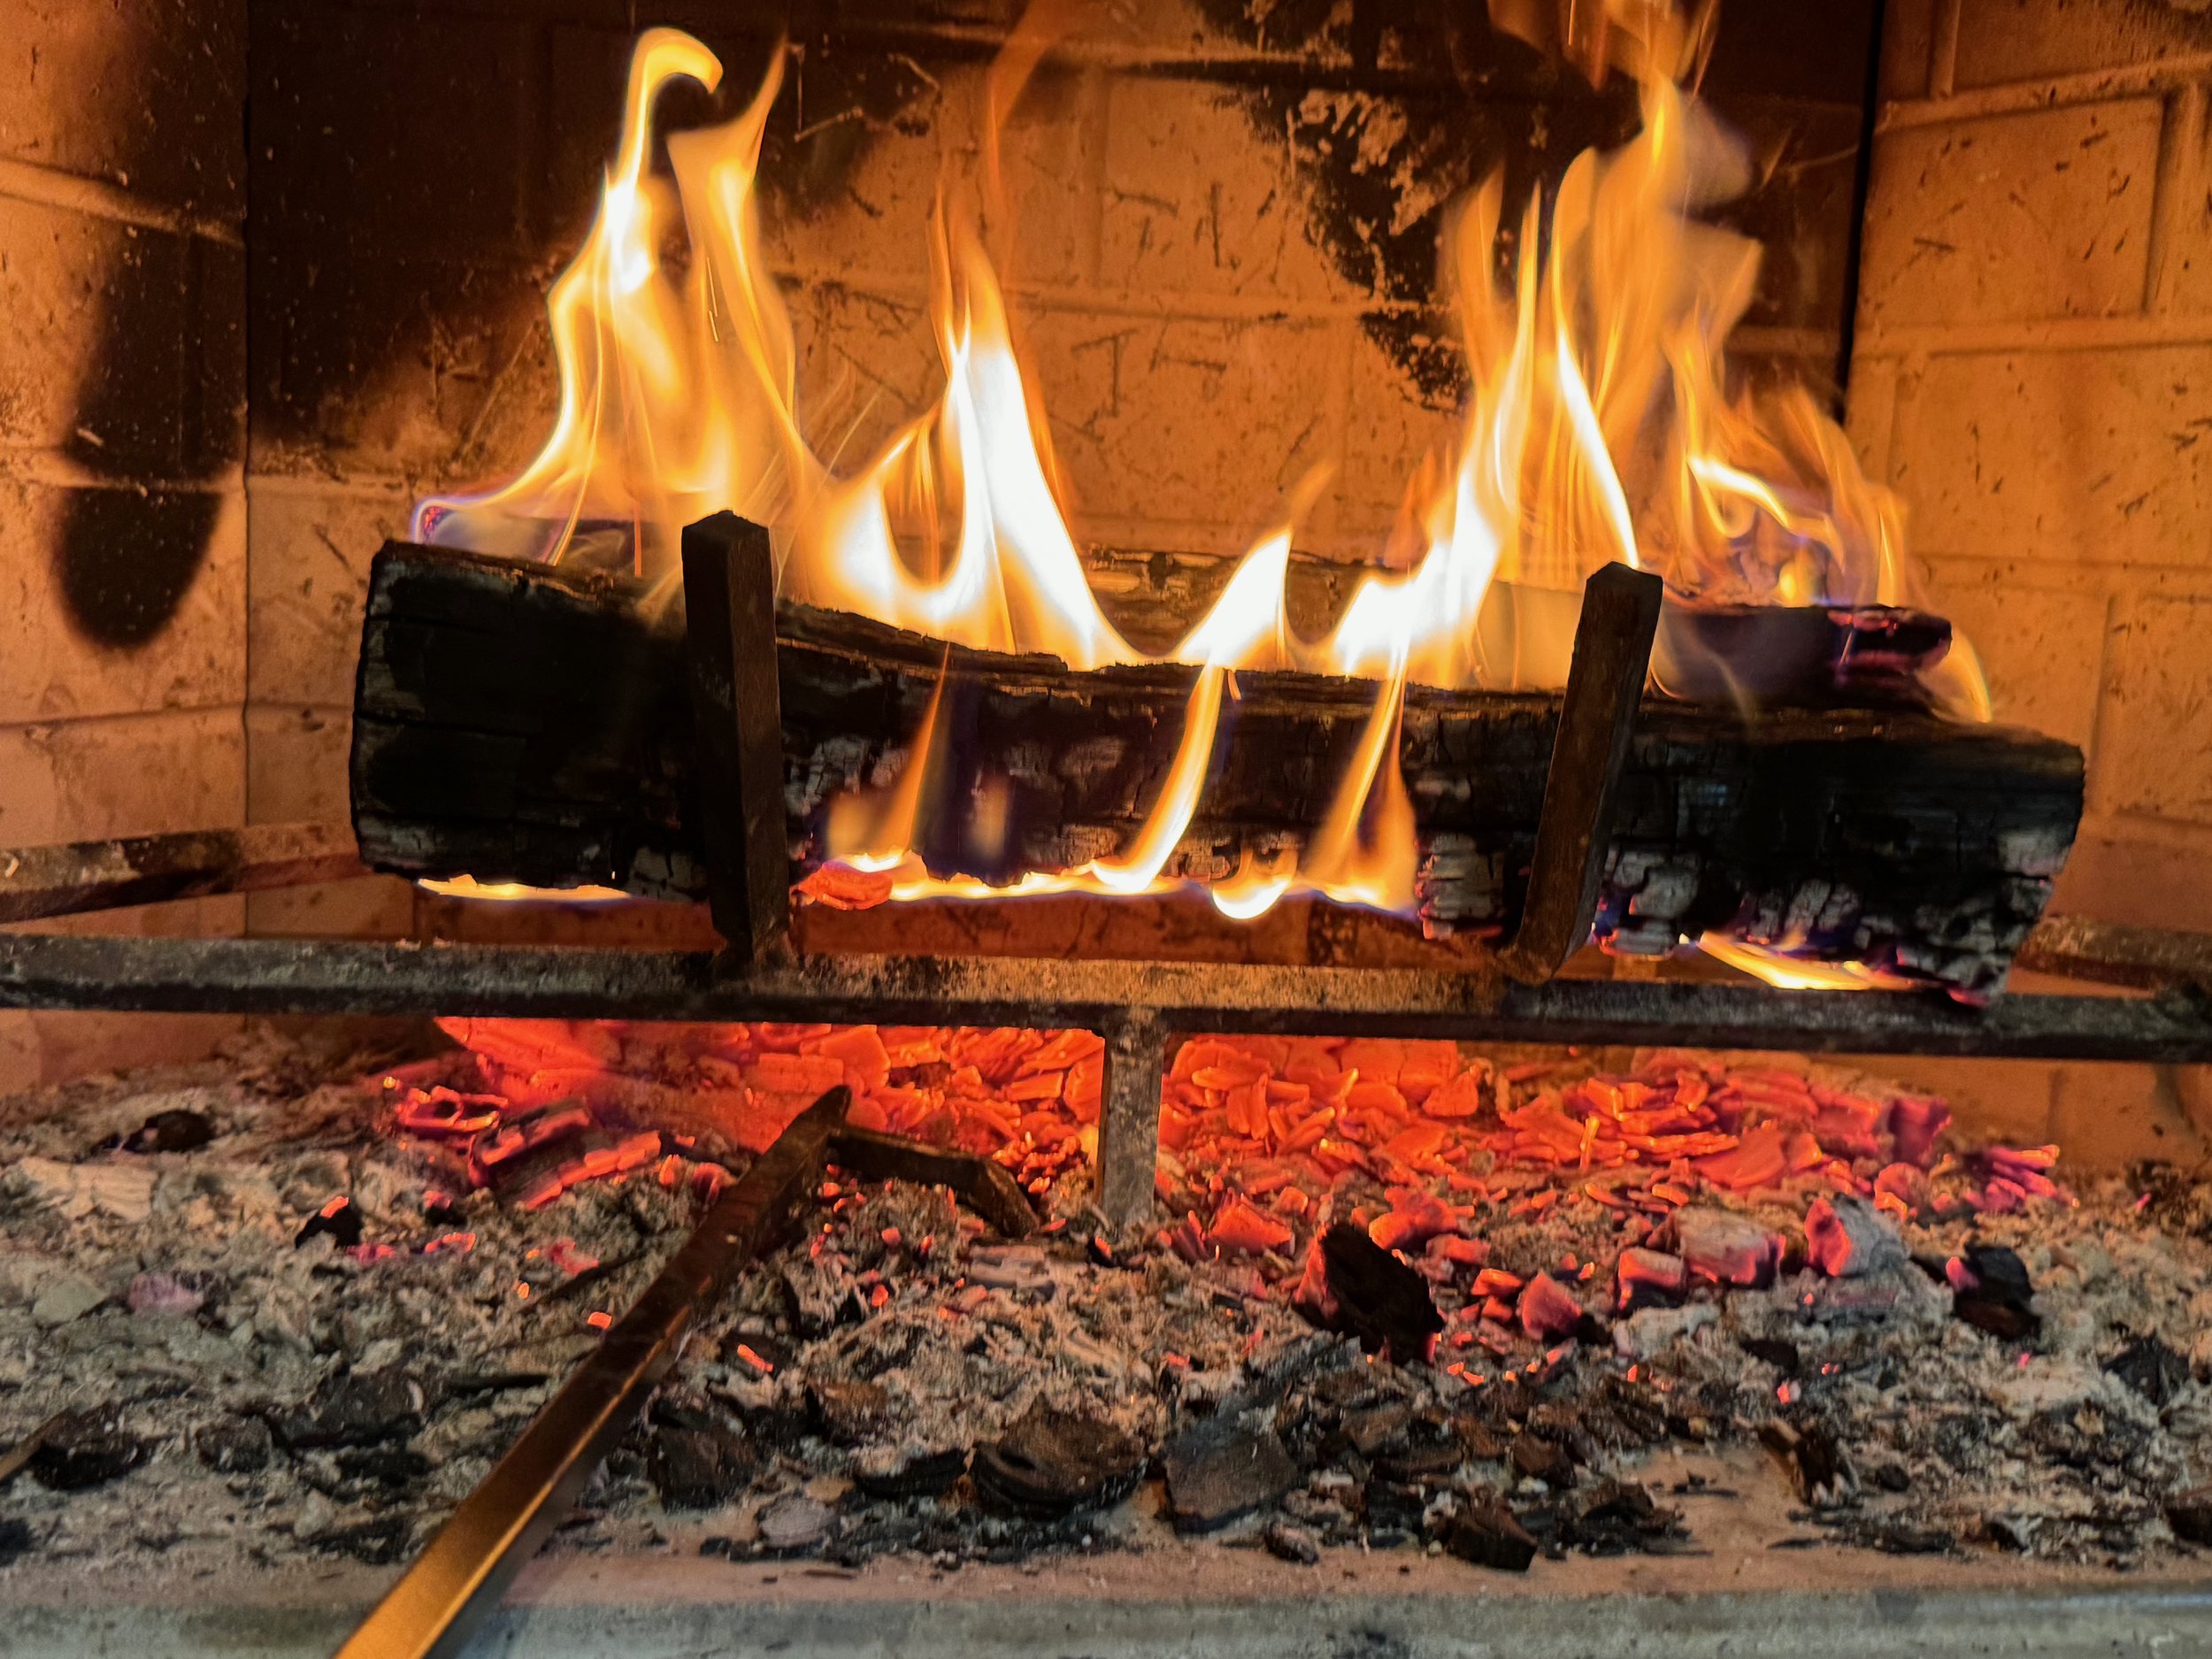
Once the new log is lit, you can let it drop down to the rack, too. If there’s room, you can have all three logs parallel, with the original front one still in front. It should be pretty burnt up by now. Now you’ve got two channels up from the coals running the full length of the new log in the center, so the flames should be getting pretty big.
Now it’s time to be aggressive with your tools. As the bottom layers of the logs become crumbly, scrape off the coals with a tool, and then spread out the bed of coals across the whole bottom of the fireplace. You’re going to use “heat rises” to its greatest possible effect.
Before long, the fire will be fully on its way.
The original two logs will likely be fully consumed before much longer. Using your tools, break them all up and spread the coals, and now you’ll have one log — the newest log — hosting a raging fire all by itself.
11. Feed and Care for Your Fire
You are now at the point where the fireplace is hot enough to keep a fire going as long as you want. It’s up to you whether you want to let it rage with multiple logs or simmer down with one at a time. I find a fireplace party tends to want to peak for a while and then ramp down slowly, so you may do a little bit of both.
Now that you have one fully involved log with a big bed of hot coals underneath, you can keep the fire big by just putting a fresh log in front of the old one with a small gap in between. As the back one is consumed, it will crumble down into the coals, and then you can push back the new one and add another in front.
When it’s time to let things chill out, you have enough coals to just use one log at a time now. Manage the coals so that there’s enough heat to get a fresh log started quickly, and once that one becomes coals, throw another one on. Repeat until bedtime.
Remember never to leave a fire unattended. When it’s almost time for bed, let the log on the fire exhaust itself, then crumble it up and spread the coals out. If it’s certain that nothing is on fire enough to jump out of the fireplace anymore, draw the screen closed, and you should be good to go.
In the morning, you’ll have a nice, fresh bed of ashes ready for your next fire.
See Also:

How to Build a Fire in a Fire Pit
Keep your people cozy in the cold.
